FREE STANDARD SHIPPING, ALWAYS
Get Creative: Advanced Techniques for Designing Photo Books
Published 9/15/23
Photo
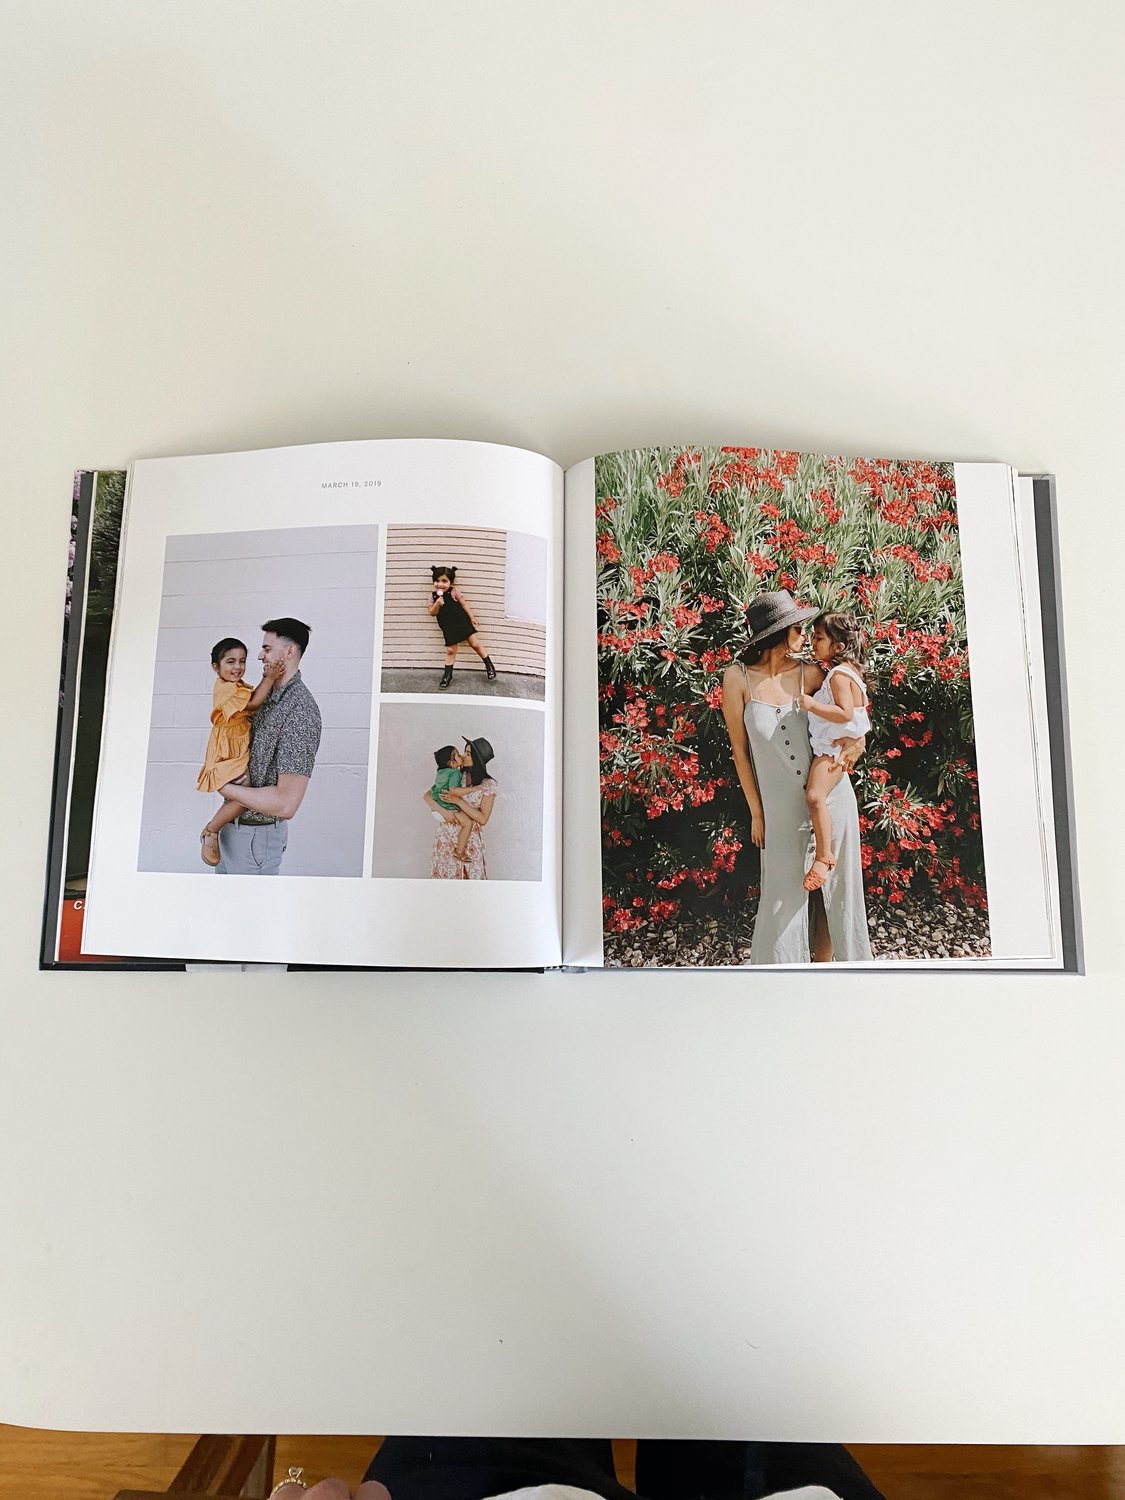
You want your photo book to tell your story—even if that story is a succession of pics of your beautiful Sunday roast right before your dog hopped on the table for a bite. That’s one you’ll want to remember! With nifty tricks like adding collages and captions to your book, you can recount your memories exactly how they happened, all on one page. With these advanced tips for improving your photo book designs and layout, you’ll be well on your way to becoming a pro photo book designer in no time.
No two photo books are the same. Each album holds different memories from different vacations, family gatherings and more. Whether you’re creating a personalized birthday photo book, travel photo book, baby book, wedding photo album, or a spontaneous and sentimental photo book just for fun, you can capture the essence of each memory by adding collages for different photo book layouts, text pages and more. If you’re someone who loves staying on top of your family’s memories with monthly photo books, you can also customize them to your heart’s content. It’s all about how you want to tell your story.
How Do You Want to Tell Your Story?
If you’re making that vacation photo book, do you want to begin with that pre-departure selfie at the airport? Or, do you want to just jump right in with that awe-inspiring pic from that sunrise volcano hike? In other words, do you want your photo album layout to be chronological, or act more as a highlight reel in no specific order? There’s no correct way to do this! It’s your photo book and your story, so tell it your way.
If you’re a fan of chronological order, Chatbooks makes it nice and easy for you to choose your photos right from your phone’s camera roll in the order you took them. Pro tip: If you’re creating a photo book from your phone, create a new album in your camera roll and fill it with the photos you want to add, this way, it’ll be a breeze designing your photo book layouts and creating your books.
Here’s an easy way to sort your photos when creating with the Chatbooks app:
- Head to your current draft and tap and hold with your finger where it says “tap and hold to rearrange”
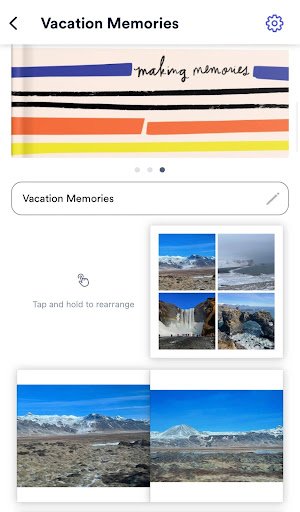
2. You can manually rearrange with your finger by tapping and dragging the pages

3. Or, you can select the “Sort” button at the top which allows you to sort from oldest to newest by date taken, newest to oldest, or shuffle

Use the Power of Collages
No scissors or glue required here! Collages are easily the hero when it comes to designing your photo book layout templates. Did you know you can maximize the number of photos in your photo book by adding collage pages? Collages also help you keep one story on one page and allows you to not have to choose between which photo to pick, you can have them all!
Creating your collage is super easy.
- Tap the page you’d like to add a collage to
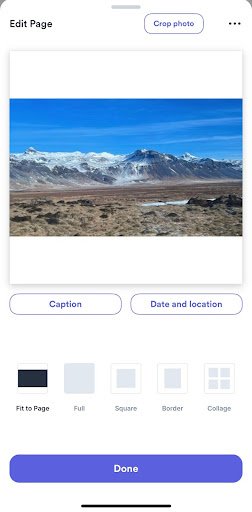
2. Choose your collage layout
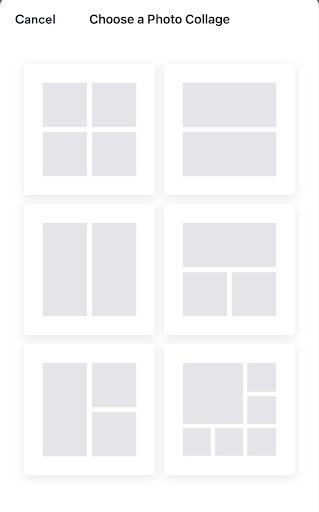
3. Add your photos from the photo source you choose, then violà! Your collage is ready to go

Remember Your Story with Captions and Date and Location Stamps
Captions are one of the best photo book layout ideas to remember your memories exactly as they were. Was there a story behind a photo that made you belly laugh like you never belly laughed before? Or, did something really cool or unusual happen? Preserve it by adding it as a caption to any photo you’d like. You can also remember where and when you took that photo by easily switching on the date and location for that photo.
- Select and tap the photo you want to create a caption for
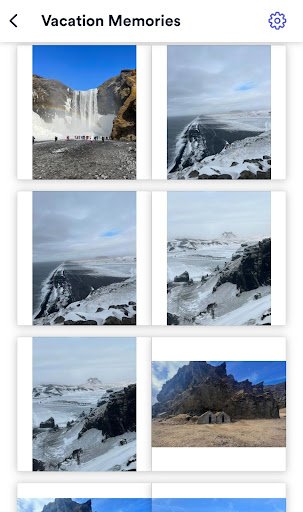
2. Tap the “Caption” button under the photo
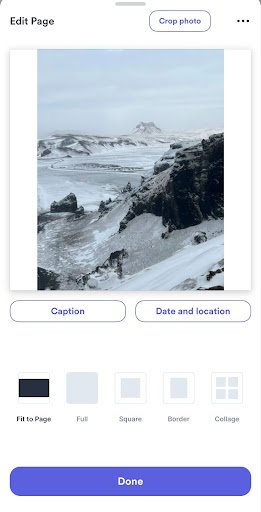
3. Type in your caption
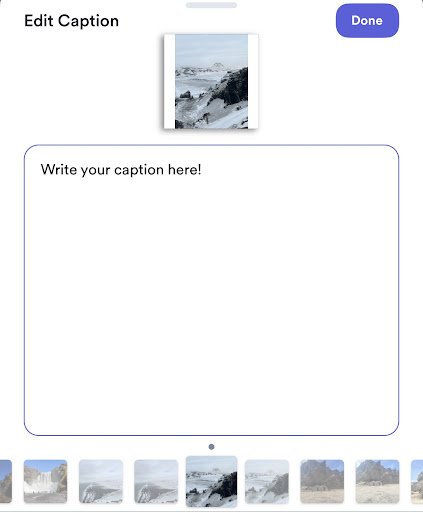
To add the date and location:
- Select and tap the photo you want to add the date and location to
- Switch date and location “on” and edit if needed
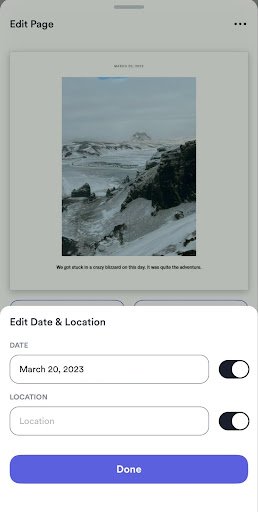
3. Watch your photo book layout design ideas come to life!
If you want to add dates and locations to all your photos:
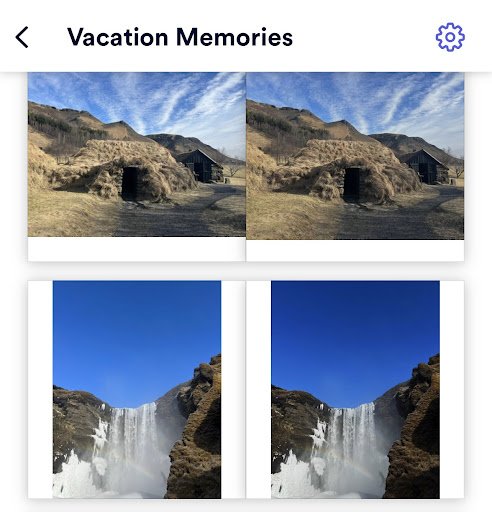
- Head to your photo book draft
- Select the settings icon in the top right of your screen
3. Select "Page Layout"
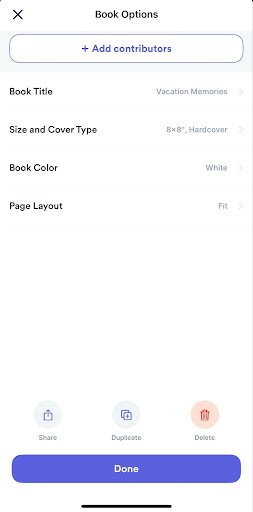
4. Select "Show All"
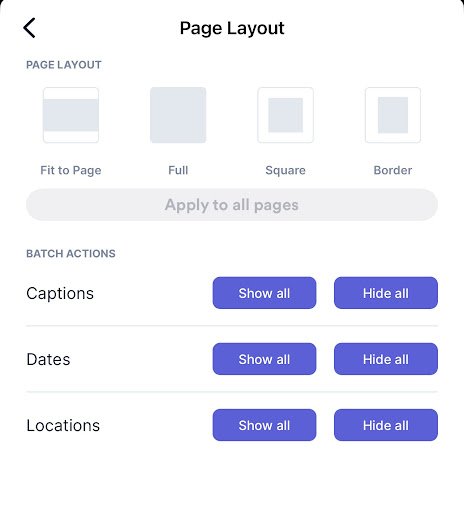
You can also select a different page layout on this screen as pictured above. You can apply the layout to a singular page or all pages in your photo book.
Sometimes Two Camera Rolls Are Better Than One
Want to add photos that someone else took to your photo book? No sweat! This is one of those photo album layout ideas that thrive with collaboration. You can easily add them as a contributor in three easy steps.
- Head to your draft and select the settings gear icon in the top right corner

2. Select the “Add Contributors” button underneath “Book Options” at the top, center of your screen
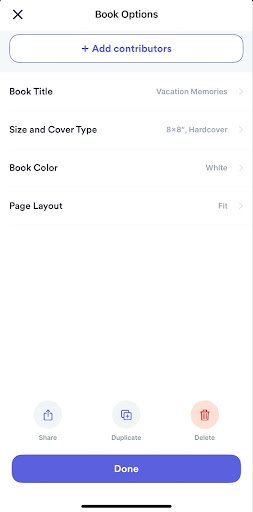
3. You can add contributors from your contacts by selecting “Invite From Contacts” or by copying and pasting a link to send by text message

4. You just leveled up your picture book layout design!
Your Photo Book, Your Way
There are no rules when it comes to creating your photo book but with these advanced tips for improving your photo book designs and layouts, you’ll absolutely want to show off your photo book to friends and family. Whether you’re wrapping up your year with a yearly photo book, creating albums with monthly photo books, or whipping up something extra special like an anniversary photo book, these tips and tricks on perfecting picture book layouts will have you designing your ultimate photo book in just a few minutes.
Related Products: Classic Photo Books, Display Your Memories With Printed Photos, Monthly Subscription Book, Monthly Minis for Little Hands, Softcover Photo Albums They'll Cherish, Baby Photo Albums, Luxury Layflats for Special Occasions
Other Blogs You May Like
What Should I Know About Photo Book Sizes?
Layflat Photo Books: Everything You Need to Know