FREE STANDARD SHIPPING, ALWAYS

7 Free Apps for Creating Photo Collages
If you have too many pictures to choose from for that perfect (and hilarious) quote about your BFF, choose from these seven free apps for creating photo collages.
Posted 8/4/2015

Photo
And after all that time spent on finding the right holiday cards and presents, and time spent at parties and around the table with friends and family, it's no wonder your camera roll is filled with sweet shots of you and your family (especially after it took you 10 minutes to get the perfect shot). Don't let those pics get lost in your phone, print them in a holiday-themed photo book (print them in a high-quality Layflat photo book and add blank text pages to create a personalized gift), or hang them on your wall with Canvas Wall Tiles. And if you love saving your favorite memories from every month, print 30 pictures each month with a Monthbooks subscription.
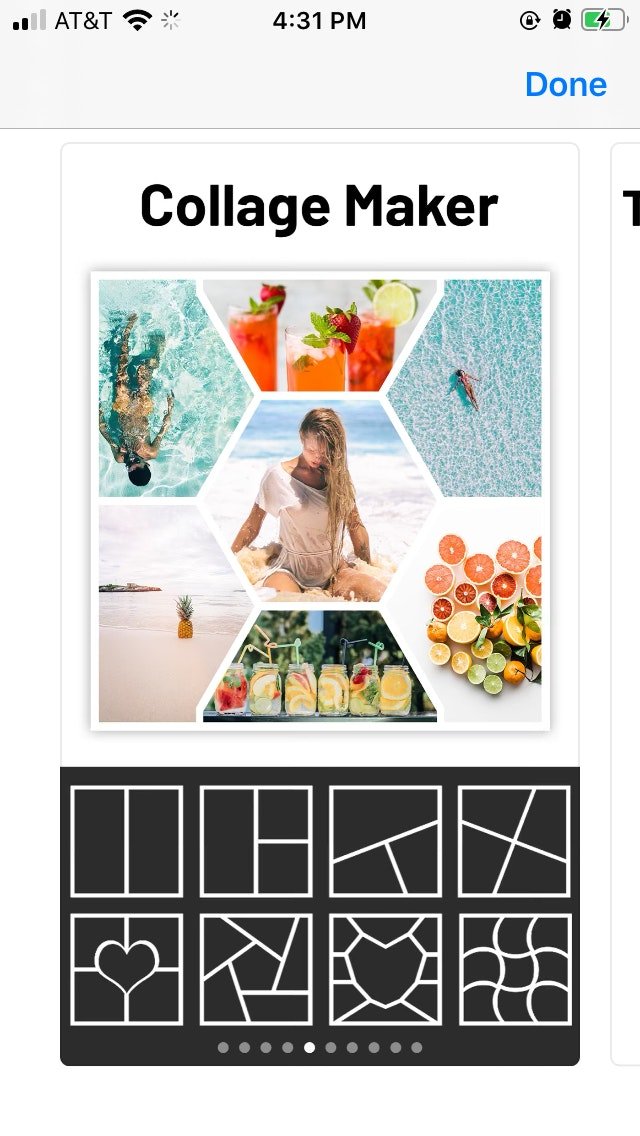
This collage tool offers a bunch of free layouts, grids, stories & pic collages so that you can customize your pages. Choose from hundreds of stickers, fonts and background patterns to bring your images to life. If you want to print photos that have a scrapbook-y feel, then Collage Maker is your new BFF.
Extra features:
- Thousands of customizable collages, grids and unique layouts
- Photo filters to choose from
- Stickers, backgrounds and fonts galore
- Ability to Crop your photos with hundreds different presets
- Ability to resize, rotate and move photos
- Move photos between grids by drag and drop
- Drag and drop photos from any other app to your chosen collage or template on iPad
Watermark and Ads:
- Adds a watermark
- Mixgram PREMIUM Photo Collage subscription removes watermark
Saving/Sharing Options:
- Dropbox
Pic Jointer
Find PicJointer for iOS and Android
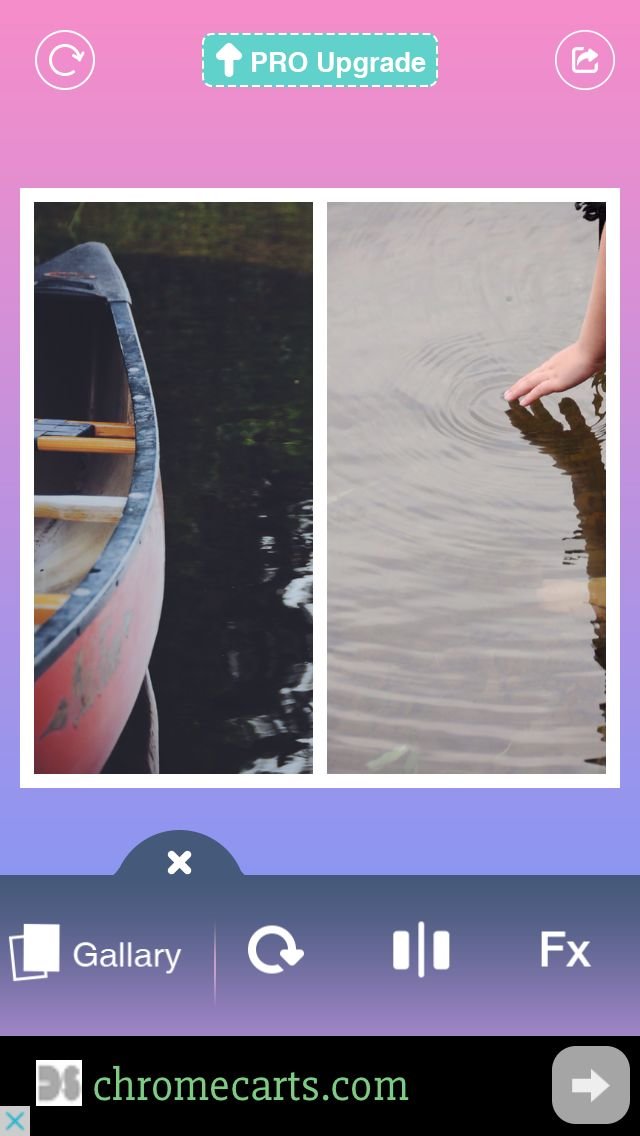
Pic Jointer is a simple app that does photo grids and that’s about it. Very simple and easy to use. You can easily select photos and add to your grid, change the size of each photo within the grid, and change borders and corners. Change the overall size of the grid or parts of the grid with a slider. Make rounded corners on each section of the grid, flip and rotate photos, but you can’t get rid of the borders completely between photos.
Extra features:
- There are some extra features available for purchase if you upgrade. No text.
Watermark and Ads:
- Pic Jointer doesn’t save a watermark or logo on the grid you create.
- Ads play in a banner at the bottom of the screen.
Saving/Sharing Options:
- Message
- Camera roll
Size and Compatibility:
- Size: 11.1 mb iOS, 11m android
- Requires iOS 7.0 or later. Compatible with iPhone, iPad, and iPod touch. This app is optimized for iPhone 5.
- Android: 2.3.3 and up
Pic Collage
Find Pic Collage for iOS or Android
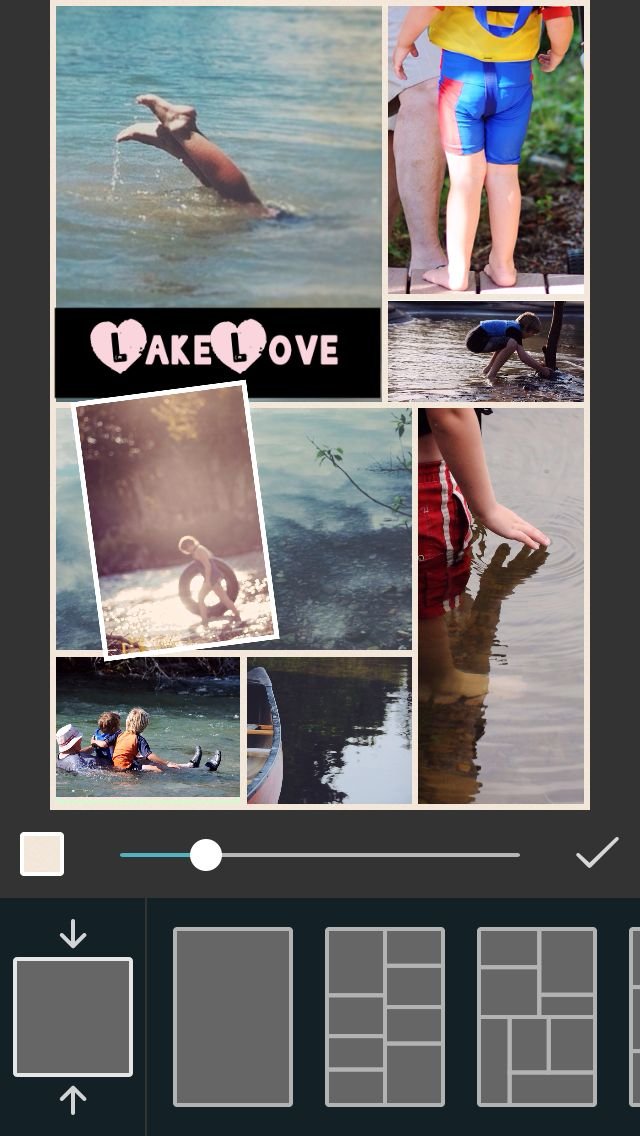
Pic Collage allows you to be very flexible in your collage-making. It gives you a blank canvas where you can add pictures and then move and resize them to your heart’s desire. Or, if you don’t like that much of a freestyle feel, you can also choose a grid from a selection of templates they have set up, and it will throw your pictures into the grid. You can then pull some out to have them free-floating. You can add all kinds of layers: text, stickers, cut-outs, etc. This is an app with flexibility.
Here’s a short video about the Pic Collage App.
Extra features:
- Drawing: you can draw on your picture. However, if you have fat fingers like I do, good luck making a drawing look good.
- Cut-outs: You can cut around a part of a picture and then add that cut-out to your collage. Again, maybe you can make yours more precise but my fat fingers had a hard time.
- Explore: See others’ creations, or participate in contests.
- Safety settings: The app has a “school settings” that allows you to disable images from web, social featuers, and ads to make it more child-friendly.
- Stickers: Lots of cutesy stickers to add to your collages.
- Text: add text to your photo collage. Several fun fonts to choose from.
Watermark and Ads:
- The collages save with a PicCollage watermark at the bottom.
- I didn’t see any ads when I was using the app, other than for the app upgrades.
Saving/Sharing Options:
- Tumblr
- Phone cases
Size and Compatibility:
- Size: 46.4 mb for iOS, varies for Android
- Requires iOS 7.0 or later. Compatible with iPhone, iPad, and iPod touch. This app is optimized for iPhone 5, iPhone 6, and iPhone 6 Plus.
- Android compatibility: varies
Moldiv
Find Pic Collage for iOS or Android
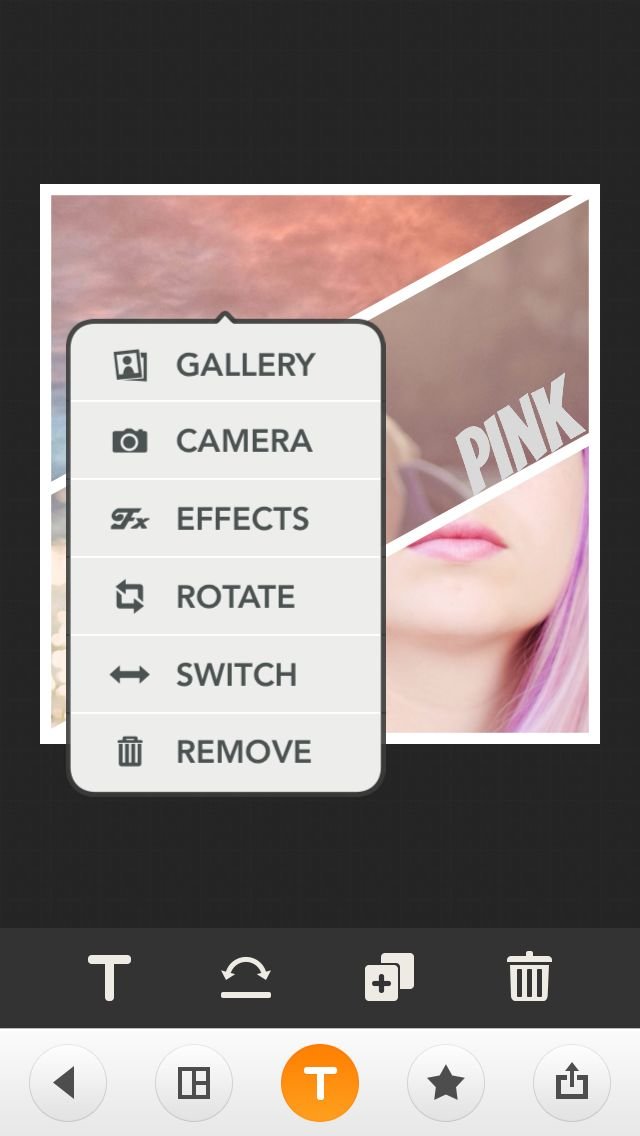
Moldiv has lots of different templates for interesting grids (beyond the standard), but many of them are by purchase only. It’s easy to use, and when you’re selecting photos for your grid it makes it very clear where in the grid your picture is going to show up so you don’t have to guess.
See a Moldiv Video Tutorial here
Extra features:
- Stamps and stickers: Lots of cutesy extra stamps and stickers
- Cut-outs: Cut out part of your picture in the shape you want
- Text: Add text to your photos, with lots of good font options.
Watermark and Ads:
- There’s no watermark on grids. The app adds a hashtag when you post, but you can delete it.
- When you use the fancy magazine layouts, those do save with a Moldiv watermark.
- There are pop-up ads when you finish a collage.
Saving/Sharing Options:
- Camera roll
- Other apps
- Tumblr
- Flickr
Size and Compatibility:
- Size: 48.1mb iOS, 44m android
- Requires iOS 7.0 or later. Compatible with iPhone, iPad, and iPod touch. This app is optimized for iPhone 5.
- Android requirements: 4.0 and up
PicsArt
Find Pics Art for iOS or Android
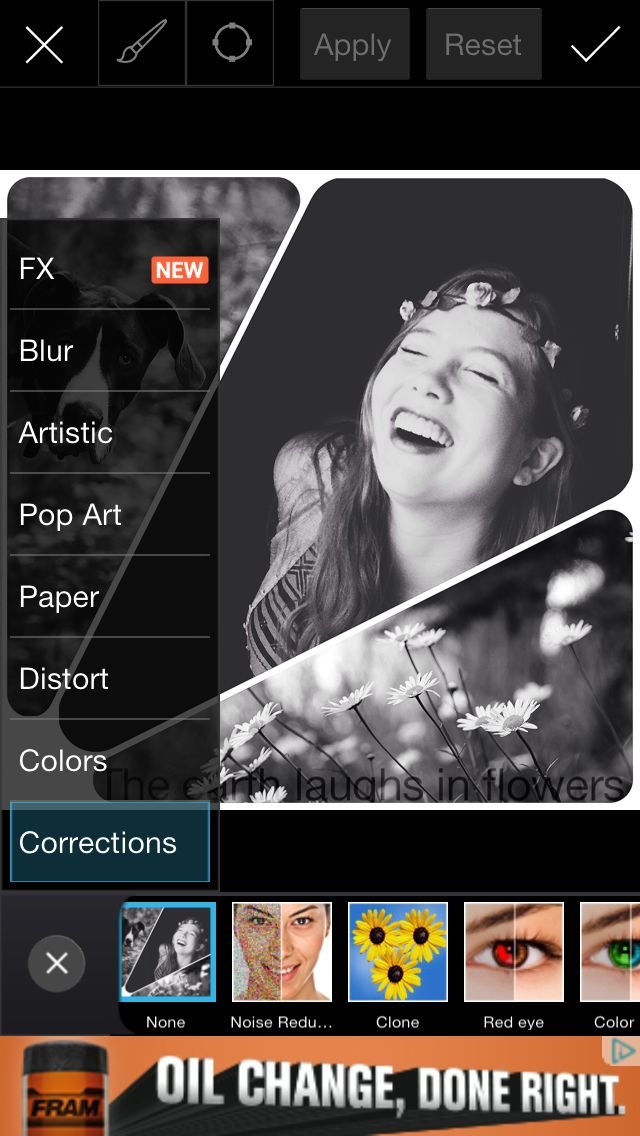
PicsArt is an app for creating collages and so much more. There are lots of editing options for the scrapbooker inside of you; in fact, there are too many options to list them all. If your inner scrapbooker is feeling limited by the digital world, this is the app for you.
Extra features:
- Embellishments: Lots of extra embellishment options, like stickers, shapes, callouts, etc.
- Drawing: Draw on your photos
- Explore: Search within the app to see others’ creations, as well as take part in contests.
- Text: add text to your photos. Change font, as well as blending mode of text (text on my photo is set to an overlay blending mode).
Watermark and Ads:
- PicsArt does not add a logo to your creation, but it will add text to your caption when you post it or share it. You can delete the text though.
- Ads display in a banner at the bottom of the screen.
Saving/Sharing Options:
- Messenger
- Camera roll
Size and Compatibility:
- Size: 67.1 mb iOS, varies for android
- Requires iOS 7.0 or later. Compatible with iPhone, iPad, and iPod touch. This app is optimized for iPhone 5, iPhone 6, and iPhone 6 Plus.
- Android compatibility varies
NOTE: PicsArt is rated 12+ for infrequent and mild sexual content, nudity, profanity, humor, suggestive themes, and alcohol, tobacco, or drug use or references. Although I didn’t see any of this while using the app, I assume it is because of the ads and the “explore” feature where you can see others’ photos.
Layout
Find Layout for iOS and Android.
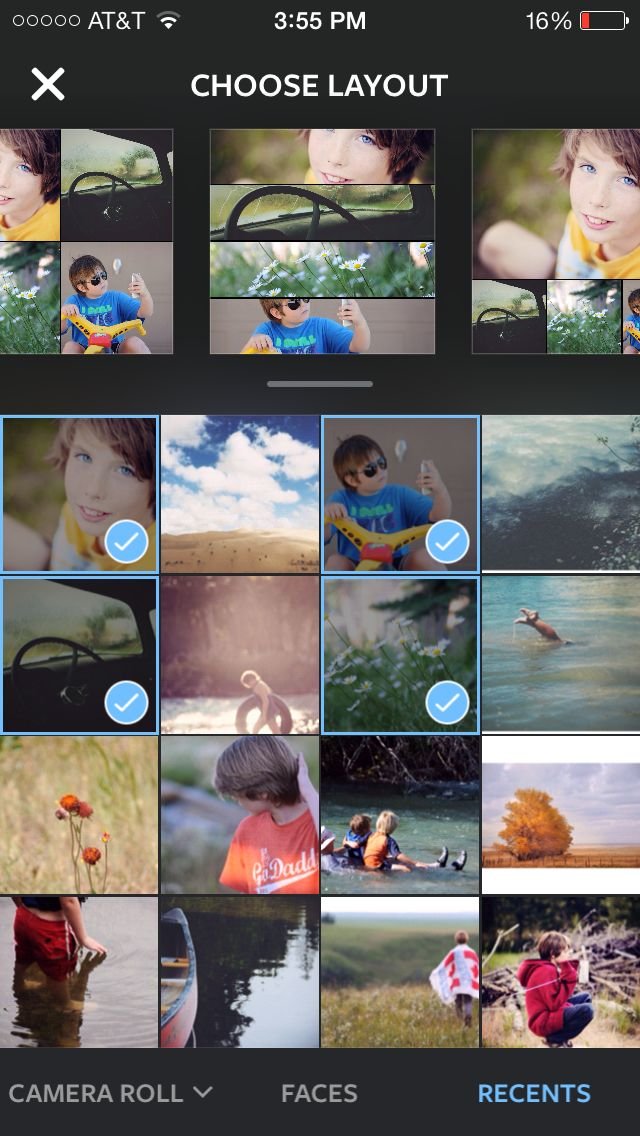
Layout is Instagram’s new creation for combining several images into one. In keeping with Instagram’s latest developments, it is beautifully designed to organize your IG life. It streamlines the process of creating collages and it’s easy to understand. Any extra options in the app make layout creation easier, rather than add a lot of extra features that waste your time and distract you. See the collages already put together as you select your photos, so you can get an idea of what they’ll look like as you’re making your photo selection.
Extra features:
- Use photobooth option to capture moments within the app
- Use faces option to see pictures of people from your camera roll
- Use recents to see last 30 photos you’ve selected
Watermark and Ads:
- Layout doesn’t save a watermark on your images.
- I didn’t notice any ads on the app.
Saving/Sharing Options:
- Messenger
- Camera roll
Size and Compatibility:
- Size: 5.9 mb iOS.
- Requires iOS 7.0 or later. Compatible with iPhone, iPad, and iPod touch. This app is optimized for iPhone 5, iPhone 6, and iPhone 6 Plus.

When putting pictures together, choose pictures that have something in common. Here are some quick tips for pairing your photos like a pro:
- Choose pictures with common content (vacation photos, birthday party photos, baby pictures, etc.)
- Show the same scene from different perspectives, or show the overall scene and then more close-up details of parts of the scene.
- Choose pictures that have visual elements in common (they’re all black and white, or all have a pop of the same color, or they’re all similar in mood).
- Get creative and try to find common visual elements in things that you wouldn’t think of as similar items.
PhotoGrid
Find PhotoGrid for iOS and Android

Choose your photos, and PhotoGrid creates a grid for you. Then, if you don’t like the layout, you can choose one of their other templates that fits your number of photos. PhotoGrid is a simple and straightforward collage maker that allows you to make photo grids, video slides, pinboards, and stitches, as well as edit single photos. In the grids, you can change the border corners, colors, size, patterns, etc. It’s easy to switch two pictures with each other within the grid, and overall the app is very easy to use.
Extra features:
- Video slides: (like Flipagram) places photos in a video slideshow
- Stitches: creates a strip of photos, like the pictures came from a photo booth
- Single: edit single photos
- pinboards: move photos around on a canvas wherever and however you want (change rotation, size, etc.)
- stickers: add stickers (like those pictured here)
- text: add text to photos (change the size, choose from several fonts, add drop shadows, outlines, etc.)
Watermark and Ads:
- No Photogrid watermark on your grids
- The app auto-fills in @photogrid and #photogrid if you post to a social media site, but you can delete the text if you wish
- Ads display in a bar at screen’s edge. I’ve clicked on them accidentally a few times.
Saving/Sharing Options:
- Dropbox
- Google+
- Flickr
- Tumblr
- Evernote
Size and Compatibility:
- Size requirements: 40.1 mb iOS, 21m Android.
- PhotoGrid Requires iOS 6.0 or later. It’s compatible with iPhone, iPad, and iPod touch. This app is optimized for iPhone 5, iPhone 6, and iPhone 6 Plus.
- For Android, it requires Android 2.3 and up.
What’s your favorite app for creating photo collages and grids? Let us know!
Readers are loving

65 Sympathy Messages To Use In a Condolence Card

35 Best Parenting Quotes That Perfectly Sum Up Family Life

32 Happy Anniversary Messages That Will Make You Fall in Love All Over Again