FREE STANDARD SHIPPING, ALWAYS

How To: Make Chatbooks Wall Tiles
Follow our step-by-step tutorial with photos for beyond easy Chatbooking!
Posted 3/3/2021

Advice
Wanna make Chatbooks Wall Tiles? Join the club! Our canvas photo tiles are perfect for family gallery walls, epic travel photos and so much more. At only $25 per tile, they are such an affordable way to turn your fav memories into inspiring decor. Our Wall Tiles come in 10x10” and 8x10” sizes, and you can choose from landscape, square and portrait canvas options.
If you want to move your Wall Tiles to another room in the house, just pull them off and restick them up to 50+ times without nails or any damage. Read on for a step-by-step guide on how to make your beyond easy Wall Tiles come to life.
How to Make: Canvas Wall TilesHow to Make: Canvas Wall Tiles
Step 1
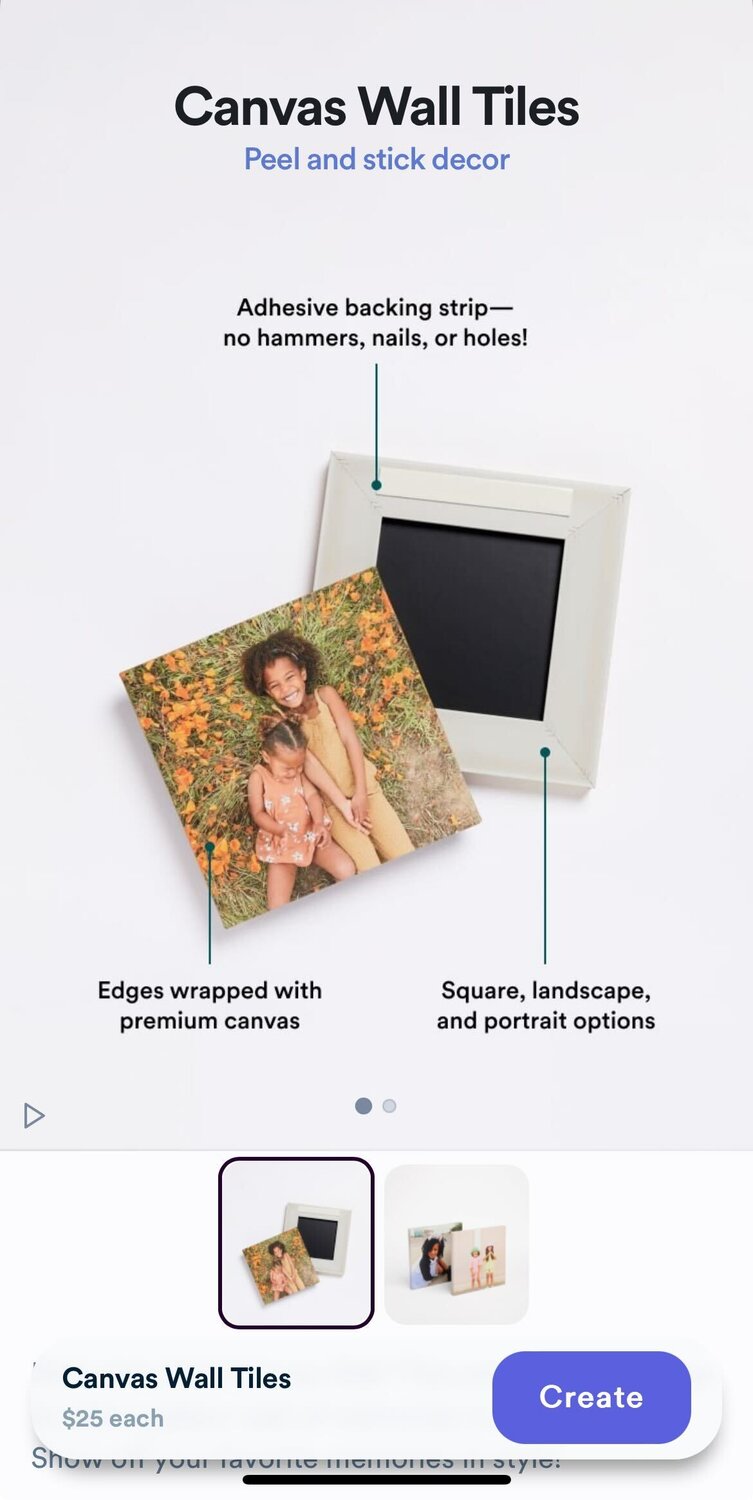
In the Chatbooks App, select Wall Tiles from the Create Screen.

Step Two
Tap the purple "Create" button
Step Three
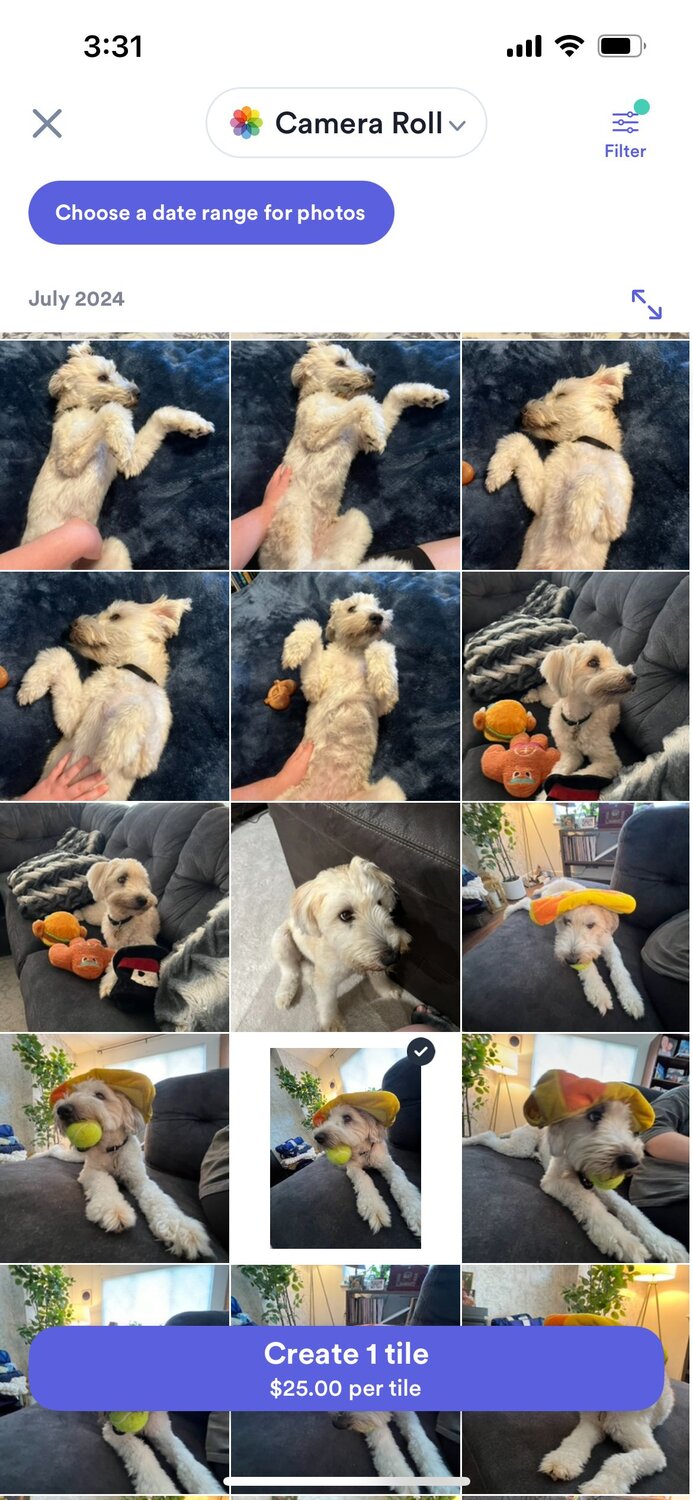
Choose your photo source and tap on the pictures you'd like to select. Then, click the purple "Create" button at the bottom when you've selected your photos.
Step Four
Choose from "Photo Blur" or "Photo Wrap" options (for the sides of your Canvas Wall Tile). This is where you can also select your size and orientation: a 10x10" square tile, 10x8" landscape tile, or 8x10" portrait tile.
Tap the purple button that says "Done" at the bottom of your screen when you're finished.

Step Five
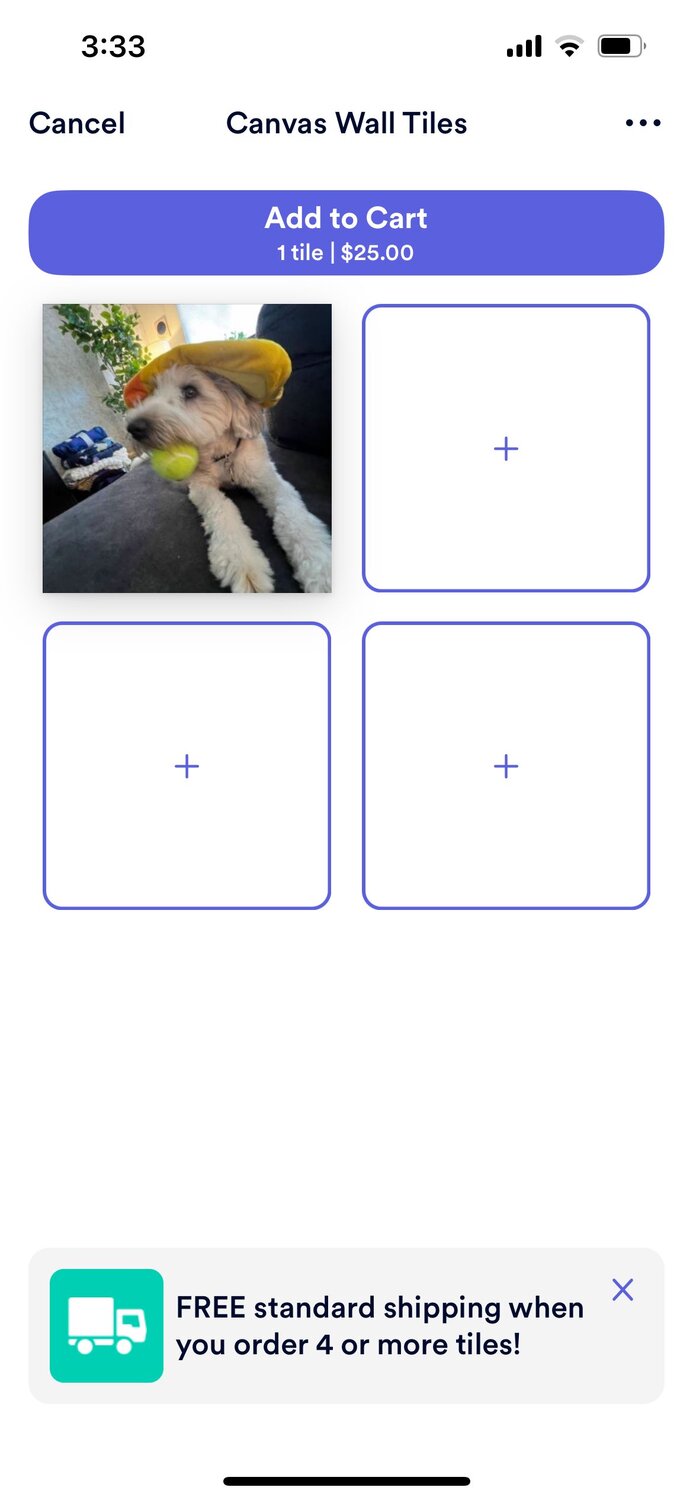
Preview your Canvas Wall Tiles (you can click on any tile to make edits). When you're satisfied, hit the purple "Add to Cart" button at the top of your screen to proceed.
You get free standard shipping when you order 4 or more tiles!
Step Six
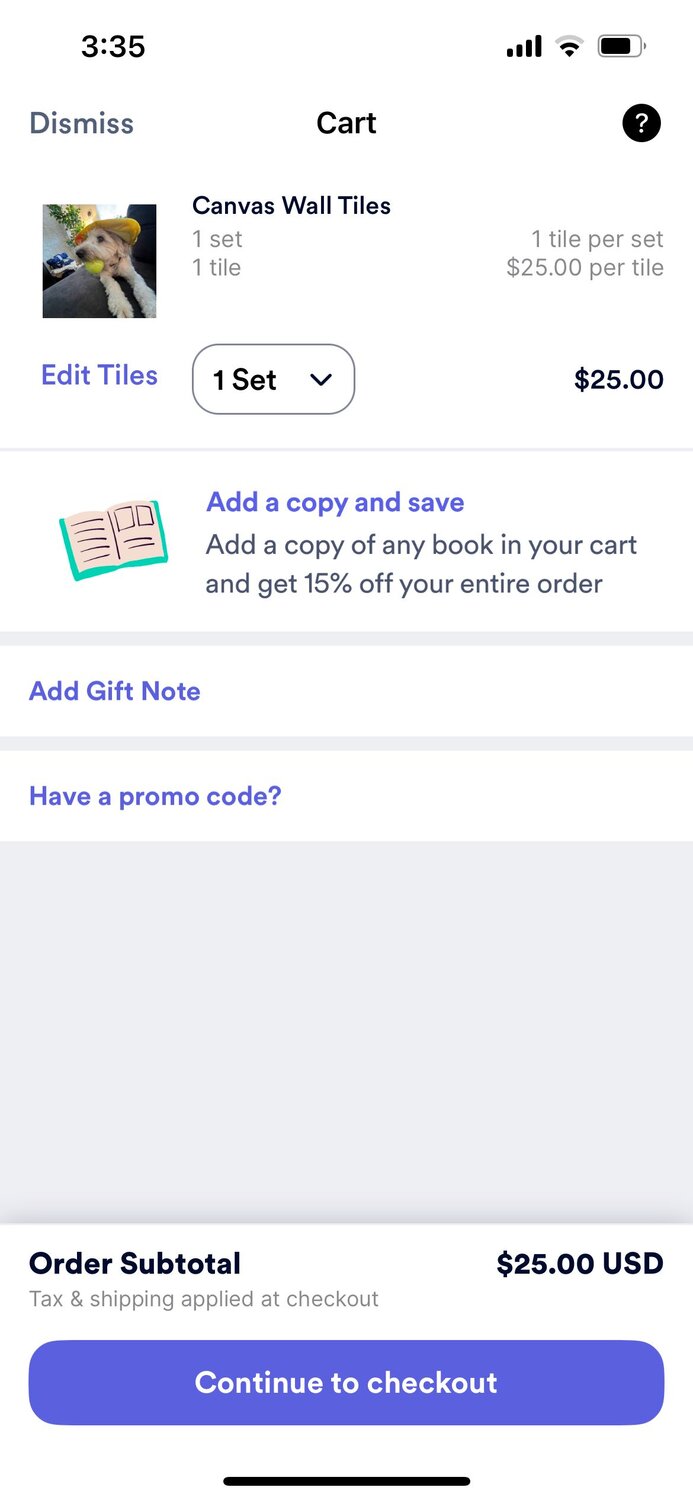
Review the items in your cart. When you're ready, hit the purple "Continue to checkout" button at the bottom of your screen.
Step Seven
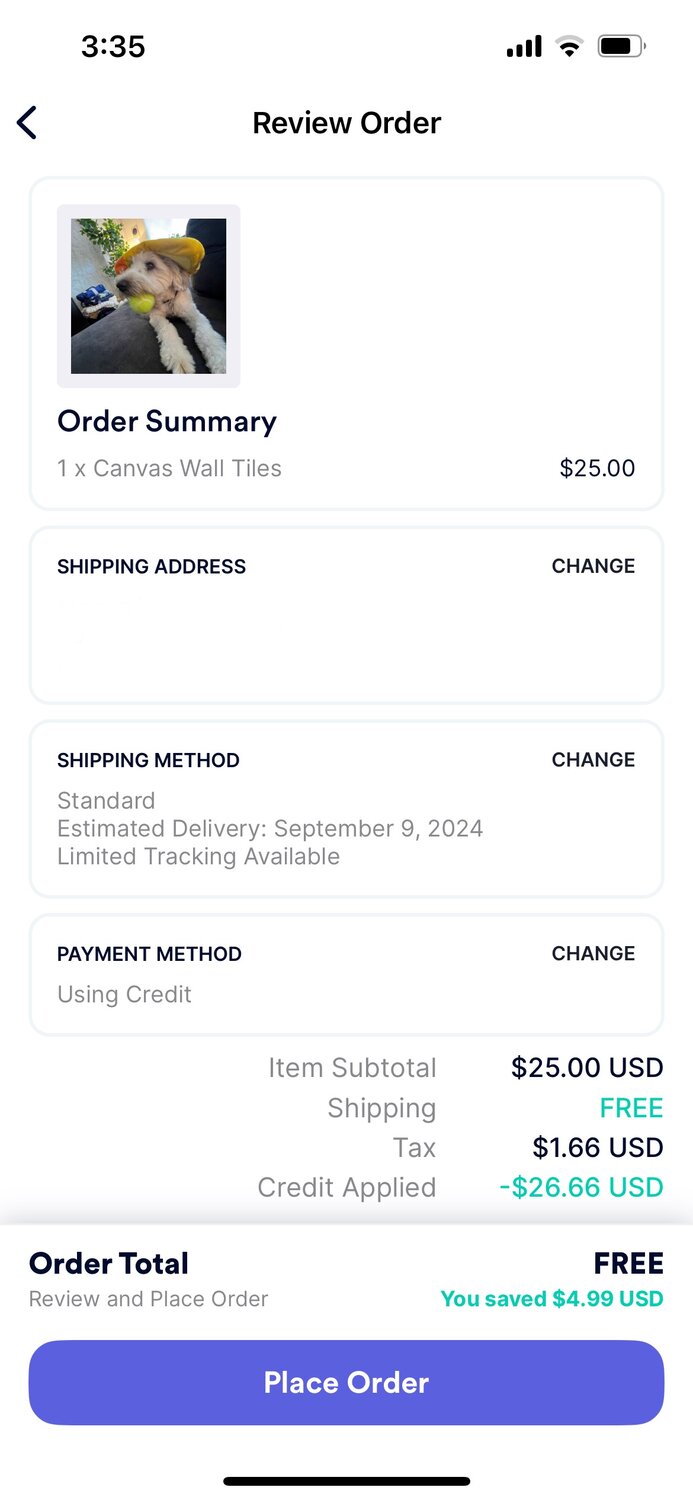
Review your order, including your shipping address, shipping method and payment method. If all your information looks correct (you can simply click on any box to edit), hit the purple "Place Order" button at the bottom of your screen.
Readers are loving

70 Romantic Wedding Vows

65 Sympathy Messages To Use In a Condolence Card

35 Best Parenting Quotes That Perfectly Sum Up Family Life